Wtyczki e-commerce
Invoice Ninja (cloud)
Connect hosted Invoice Ninja Pro or Enterprise from Bookkeeping and add MakePay payment links to invoice PDFs and emails.
Overview
Connect your hosted Invoice Ninja Pro or Enterprise company from MakeCrypto → Bookkeeping → Integrations. MakePay adds a payment URL to each invoice, opens crypto checkout in that invoice's currency, and records confirmed payments back in Invoice Ninja.
You can keep using Invoice Ninja's hosted service. This connection uses its API and custom PDF/email templates. MakePay does not appear in the hosted service's built-in payment gateway selector.
For a self-hosted installation with a native client-portal gateway, use the separate Invoice Ninja gateway guide.
Repository and examples: makepay-apps/makepay-invoice-ninja. Start with the Cloud guide.
Watch the captioned Cloud setup walkthrough (2 minutes 12 seconds). It follows the steps below using actual setup screenshots and unfunded QA checkouts.
Before you start
You need an Invoice Ninja plan with API access, an administrator API token for the company you want to connect, and an unused invoice custom field. Configure your MakeCrypto merchant's settlement settings first. Your invoice can use USD, EUR or another supported invoice currency; it does not need to match the settlement asset.
Complete any phone or sender verification Invoice Ninja requests before testing email delivery. Its email customization guide explains invoice, payment and reminder templates.
1. Create an Invoice Ninja API token
Open the correct company in Invoice Ninja, then Create API Token. You can also go to Settings → Account Management → Integrations → API Tokens and click New Token. Name it MakePay and copy it securely.
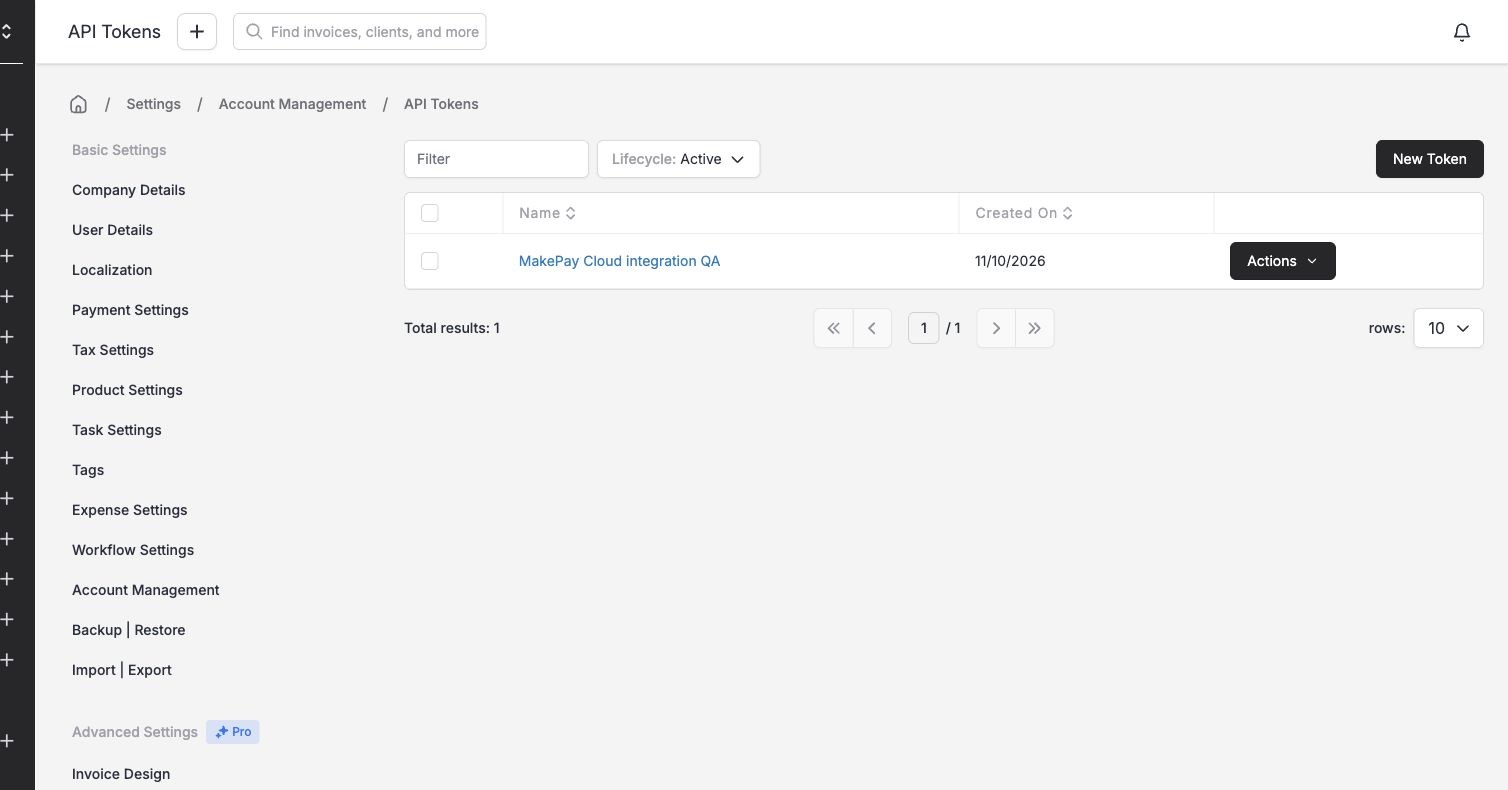
Treat this token as a company credential: it allows MakePay to read invoices, add payment URLs and record payments. Do not put it in an invoice template, browser URL or screenshot.
2. Connect from Bookkeeping
In MakeCrypto, select the merchant and open Bookkeeping → Integrations. Invoice Ninja Cloud is first in Accounting integrations, followed by QuickBooks Online and Xero. Click Connect to open the connection dialog. The Create API Token link is available both in the list and in the dialog, before you connect.
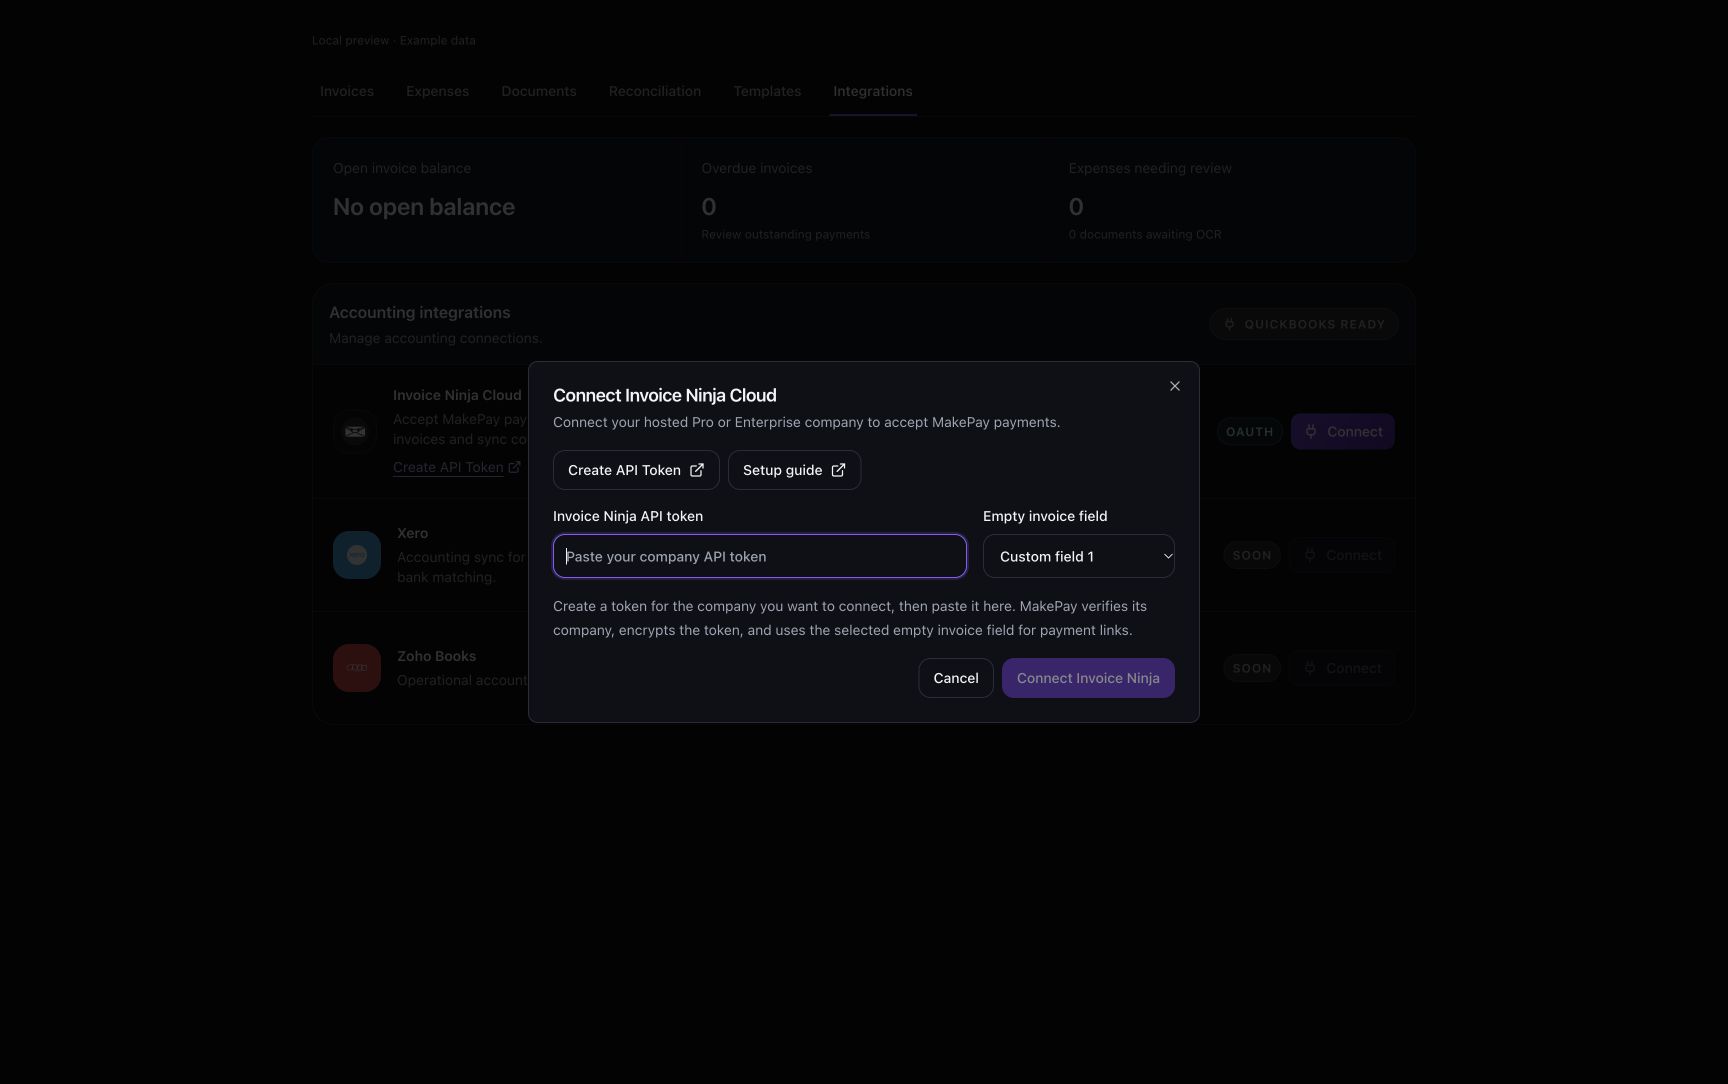
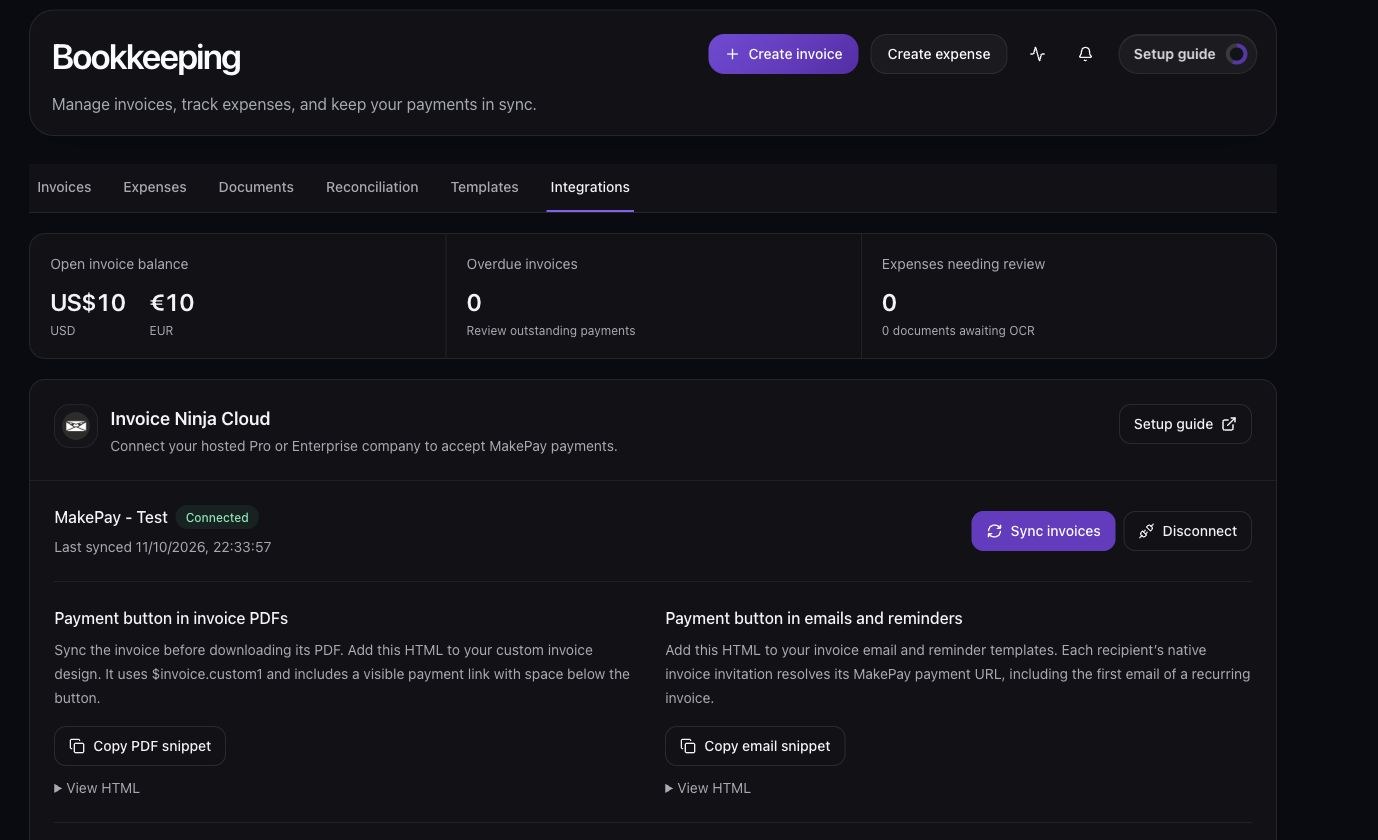
Paste the token, choose an empty invoice custom field, and click Connect Invoice Ninja. MakePay verifies the token's company, stores it encrypted, labels the selected field MakePay payment URL, and subscribes to invoice changes. When setup succeeds, the dialog closes and the connected company settings and sync controls appear above the Accounting integrations list.
Keep the selected field available for MakePay. Existing labels and invoice values in other fields are preserved. You do not need to replace your merchant's MakePay callback URL; this connector can coexist with Wix.
3. Sync and issue a test invoice
Sync runs automatically while the company is connected. Invoice Ninja notifies MakePay about invoice changes, and a background job runs every five minutes to catch missed updates, continue imports and reconcile confirmed payments. Larger accounts import in pages and can take several runs to finish.
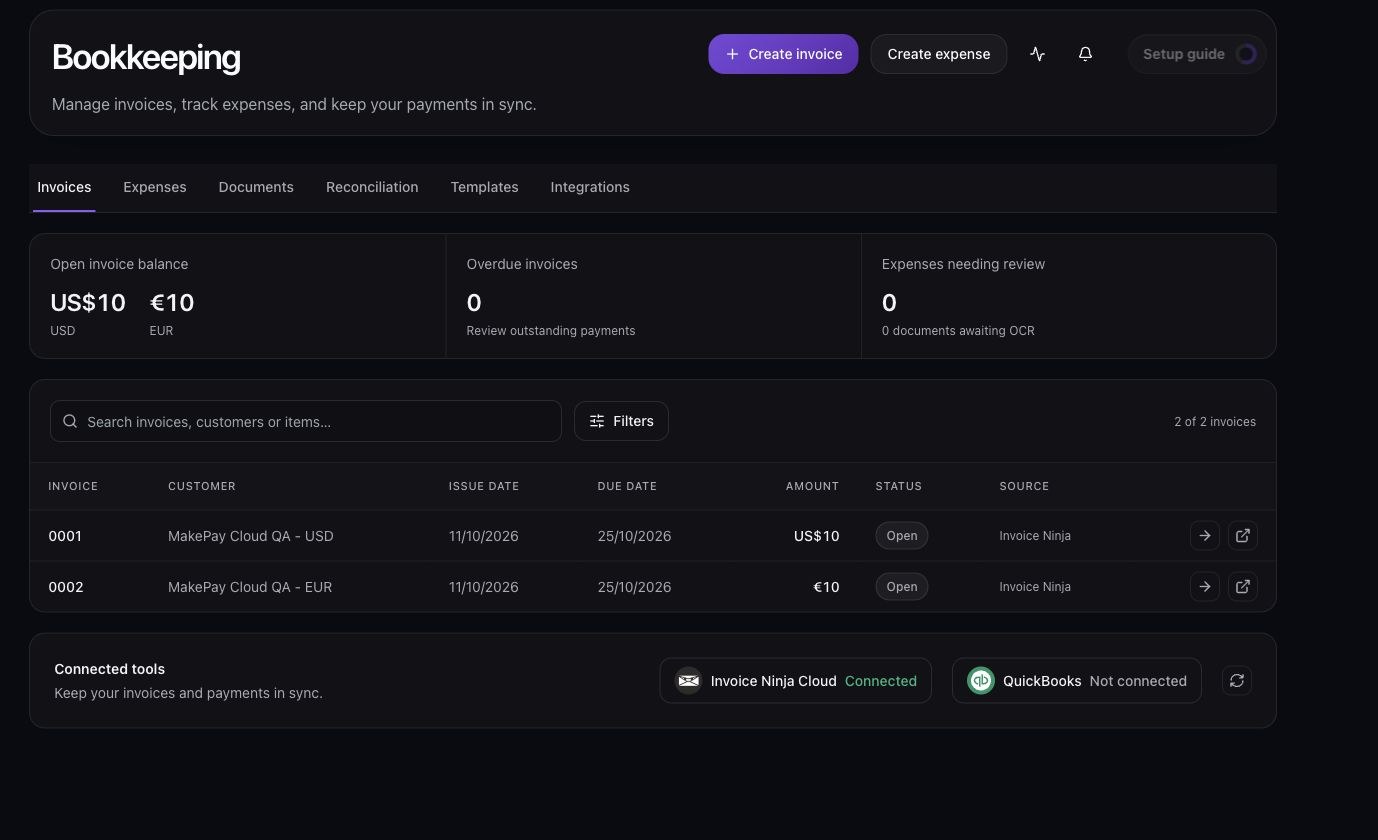
Click Sync invoices to import the next page immediately or refresh before downloading a PDF. Repeated manual syncing is optional. View imported invoices in Bookkeeping → Invoices.
MakePay adds each invoice's payment URL to the selected custom field. You still need to set up the PDF and email/reminder templates once, using the steps below. Sync does not edit those templates or replace previously downloaded PDFs.
Create a clearly labelled test invoice in Invoice Ninja. Set the client's invoice currency, add an amount, and issue the invoice. Drafts receive a stable URL for PDF preparation but cannot collect payment until issued.
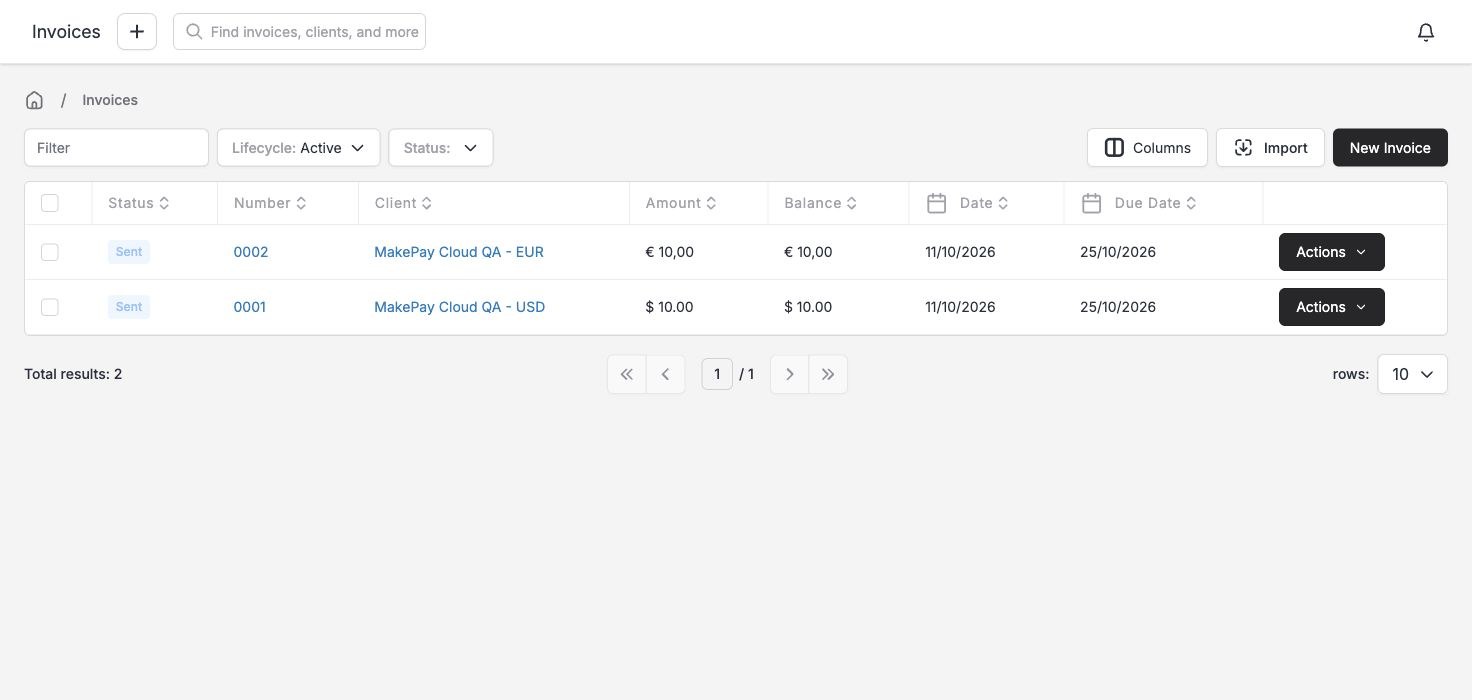
The invoice appears in Bookkeeping with Invoice Ninja as its source. Open its payment link: it goes directly to the standard MakePay checkout. Check the outstanding balance and currency there. Checkout uses the current balance fetched from Invoice Ninja, including partial payments.
4. Add the payment button to PDFs
In the connected MakeCrypto panel, click Copy PDF snippet. It references the custom field selected for this company, such as $invoice.custom1.
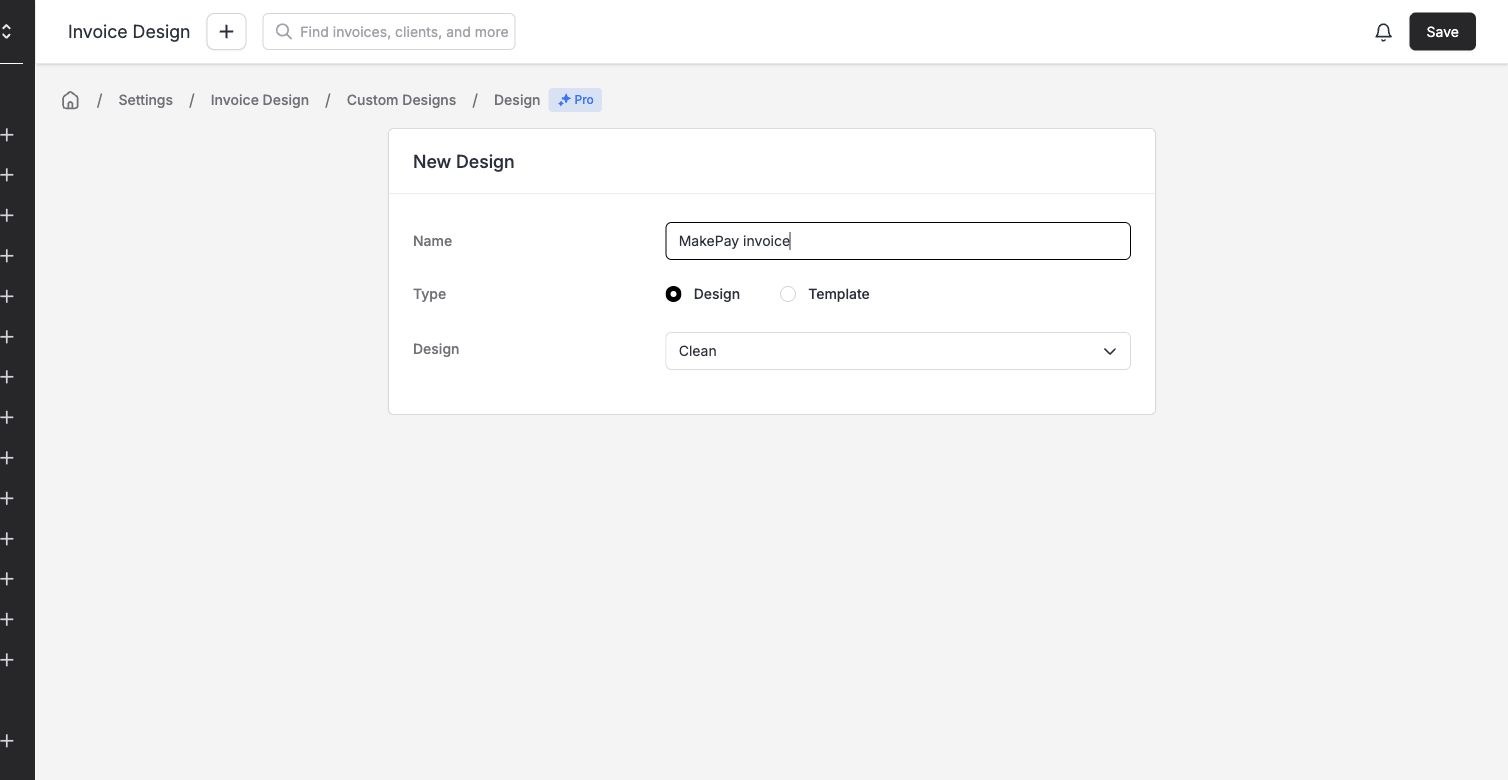
Click Open PDF design editor in MakeCrypto, or open Invoice Ninja's Custom Designs. Select the company connected to MakeCrypto, then choose New Design. You can also navigate through Settings → Invoice Design → Custom Designs. Name the design MakePay invoice, keep Type: Design, choose Clean as the starting design, and click Save.
Open the saved design's Settings tab and enable HTML Mode. In Body, paste the PDF snippet immediately after the totals element, inside the same table cell. For the Clean design, that element is <div id="table-totals" cellspacing="0">$status_logo</div>. Keep the existing invoice HTML around it, then click Save.
Select your saved design in Settings → Invoice Design → General Settings → Invoice Design, or select it for an individual test invoice first.
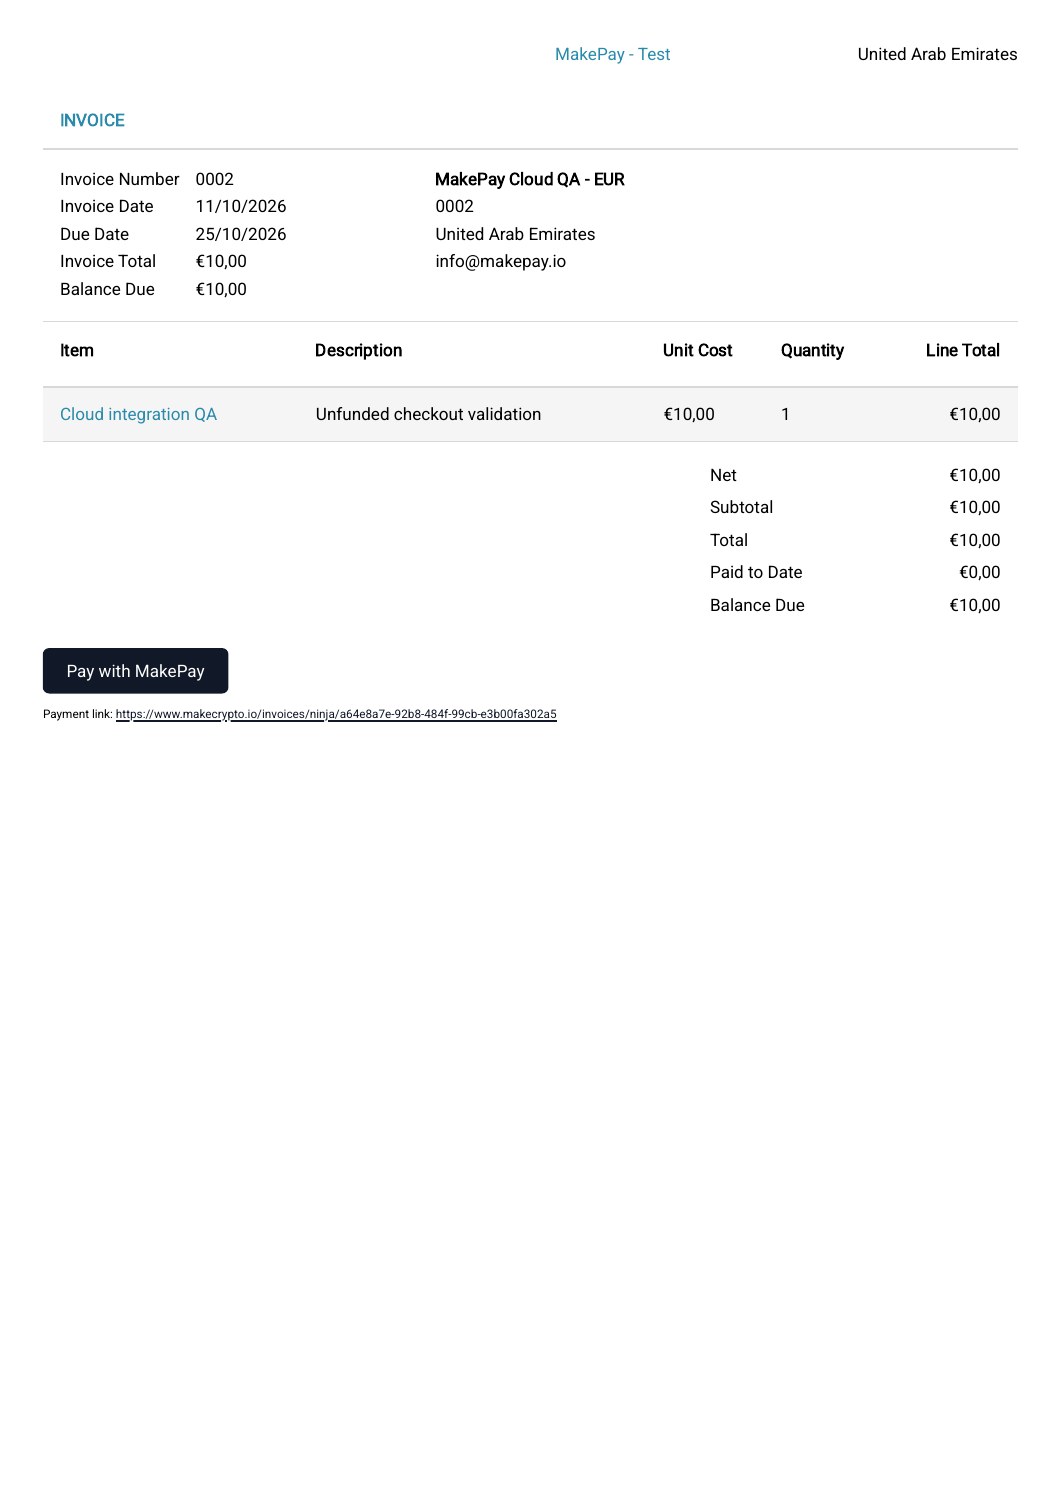
Sync the invoice before downloading its PDF. Open the actual downloaded file and click Pay with MakePay. The snippet also prints a visible Payment link below the button, with space between them. Use that URL if the PDF viewer does not follow the button link. If the URL is absent, sync first and regenerate the PDF.
Changing a design affects newly generated PDFs. An older PDF will retain its earlier contents.
5. Add the button to invoice emails and reminders
Click Copy email snippet in MakeCrypto, then Open email template editor, or open Invoice Ninja's Templates & Reminders. Select the company connected to MakeCrypto and the Invoice tab. You can also navigate through Settings → Templates & Reminders → Invoice. In the Body toolbar, click the document/code icon to open Source Code, append the snippet to your existing message, then click Apply and Save. Keep your existing subject and invoice variables.
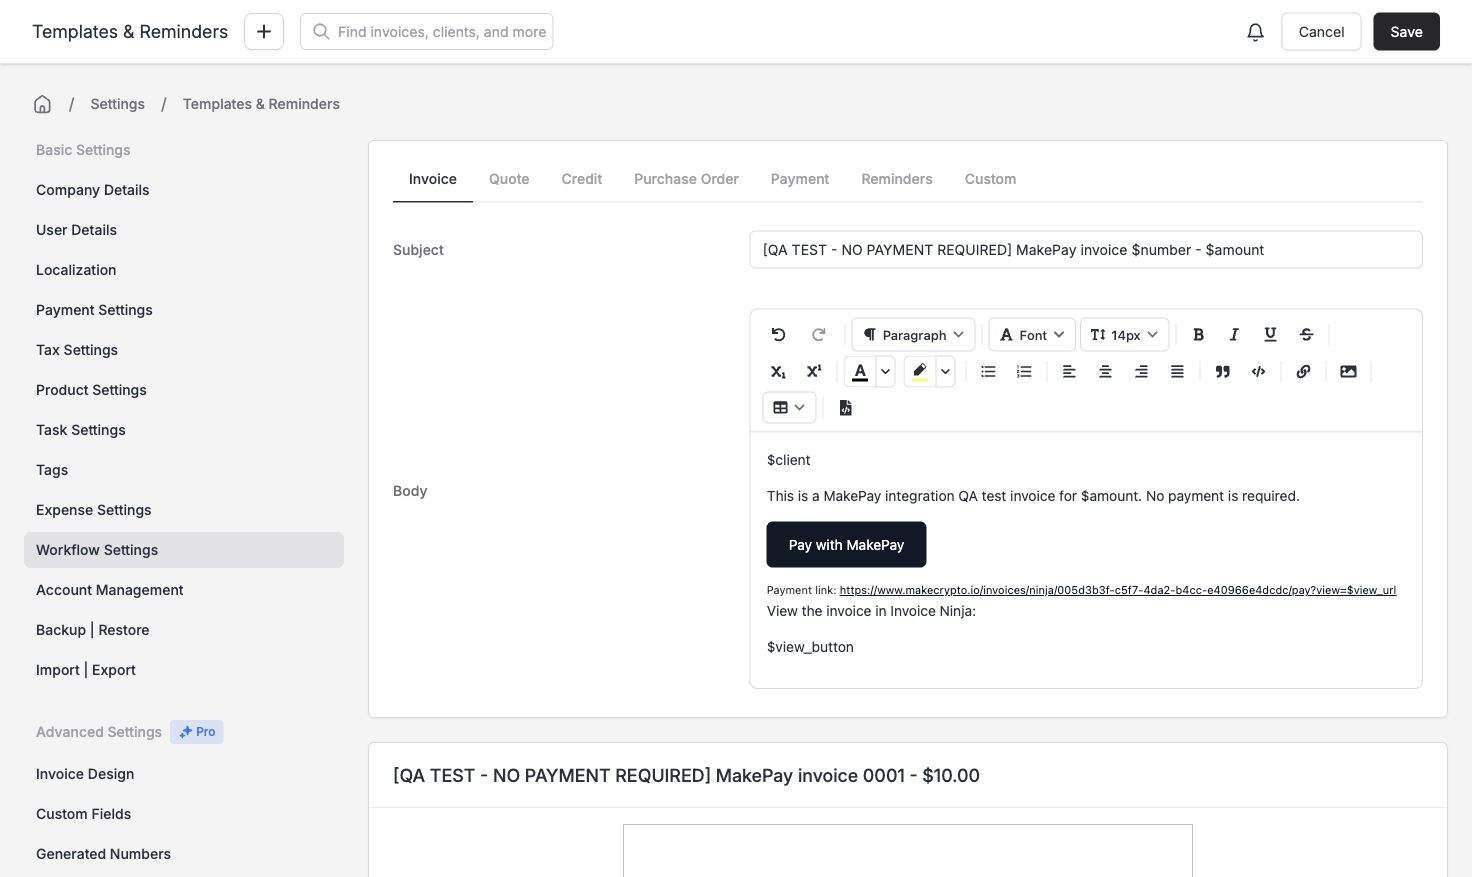
Open Reminders → First Reminder and repeat for each reminder template you use. Choose a reminder schedule and enable Send Email if you want it to run automatically. Adding a button to a template does not enable its schedule.
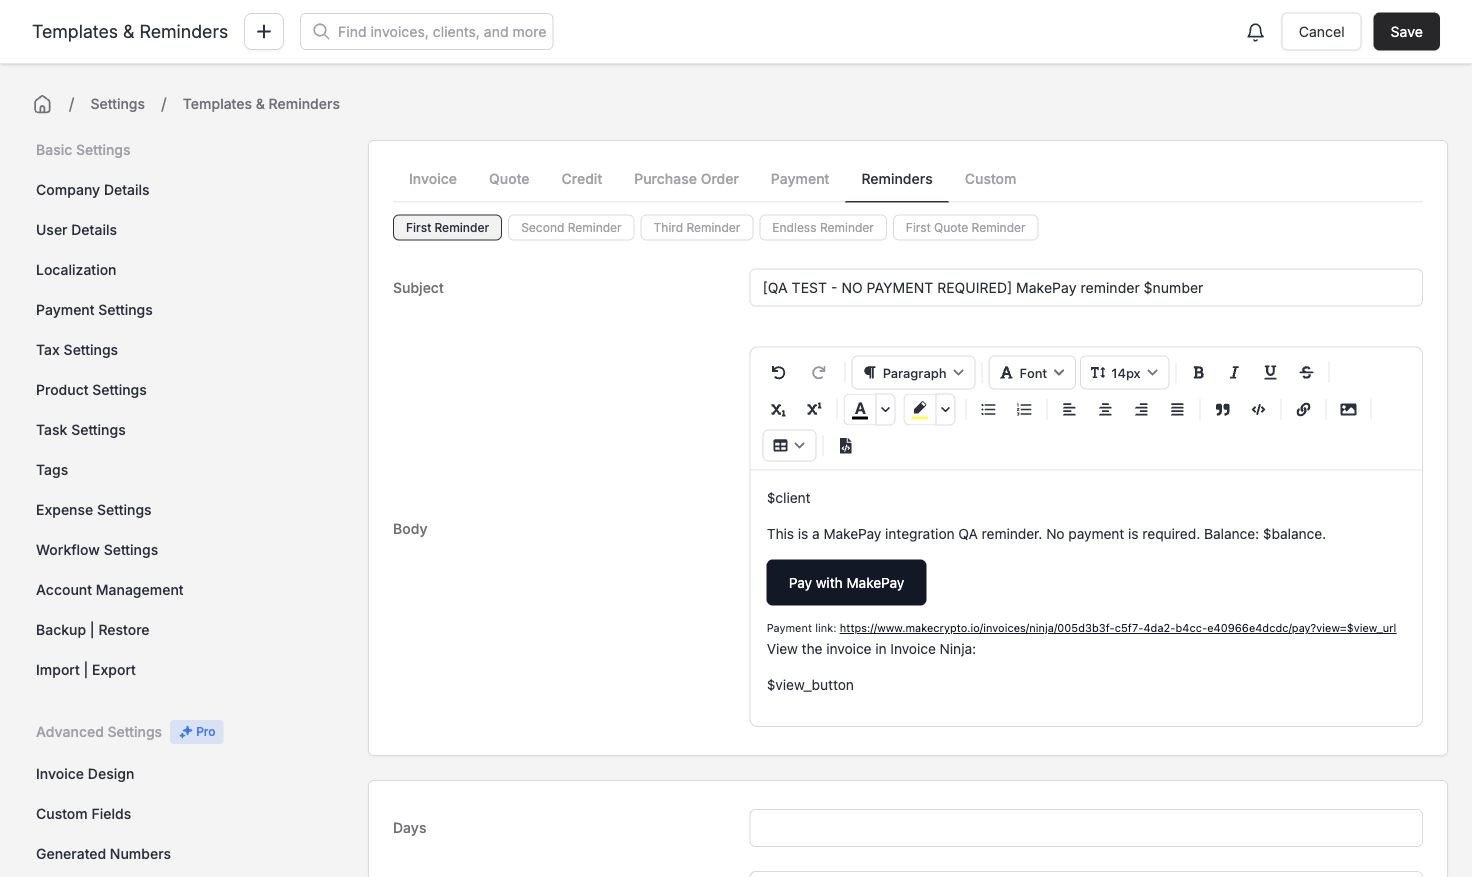
Use the email snippet, which includes Invoice Ninja's $view_url invitation variable. It resolves the recipient's invoice even when a new or recurring invoice email arrives before its first background sync. Keep Invoice Ninja's normal invoice-view link as a fallback.
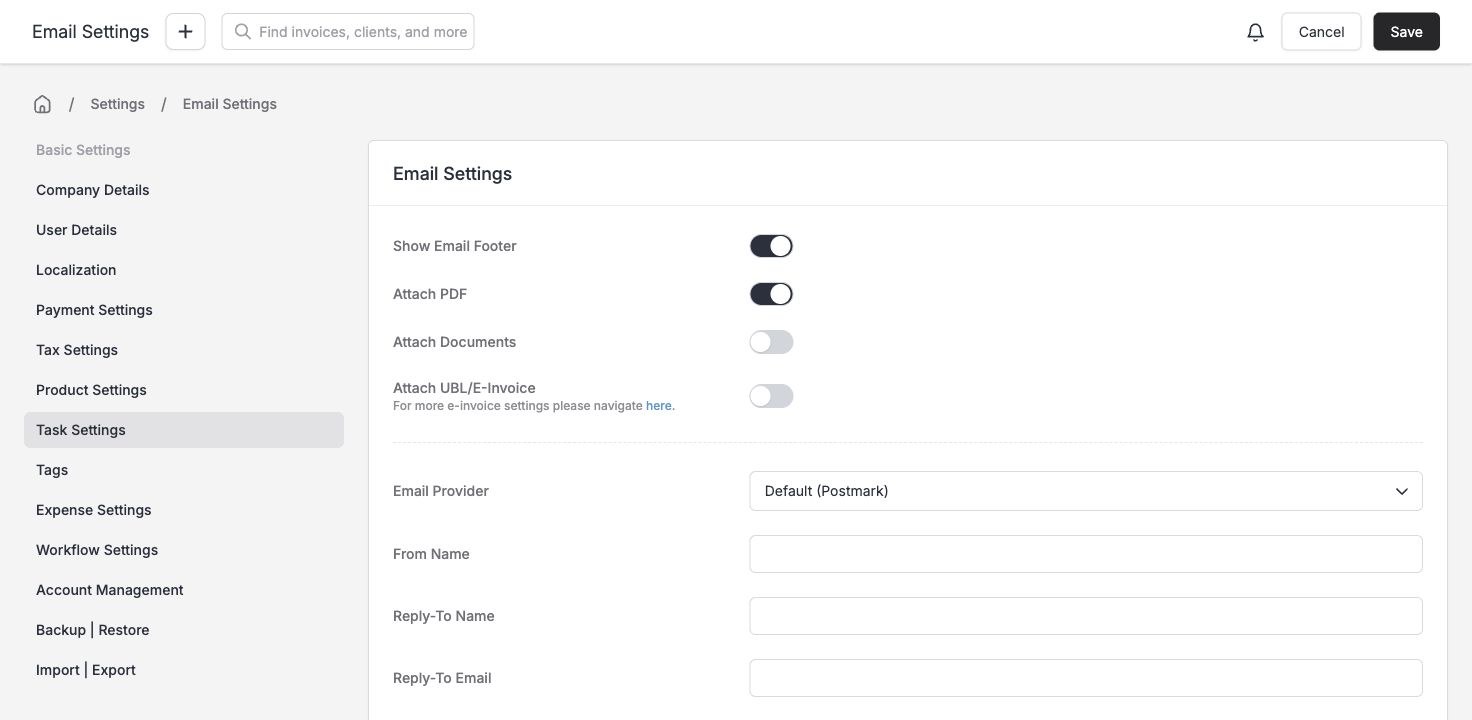
Open Settings → Email Settings, enable Attach PDF if you want the custom invoice PDF included, and save.
Open a test invoice's action menu and choose Email Invoice. Confirm its recipient, select Initial Email or First Reminder, review the preview, then click Send Email. Send to an inbox you control and check both received buttons and the attached PDF. Recurring invoices can use these links, but automatic crypto charging is unavailable.
6. Check payment confirmation
The email or PDF Pay with MakePay button opens the standard MakePay checkout directly. The customer chooses a payment asset and completes checkout. A browser redirect alone does not mark the invoice paid.
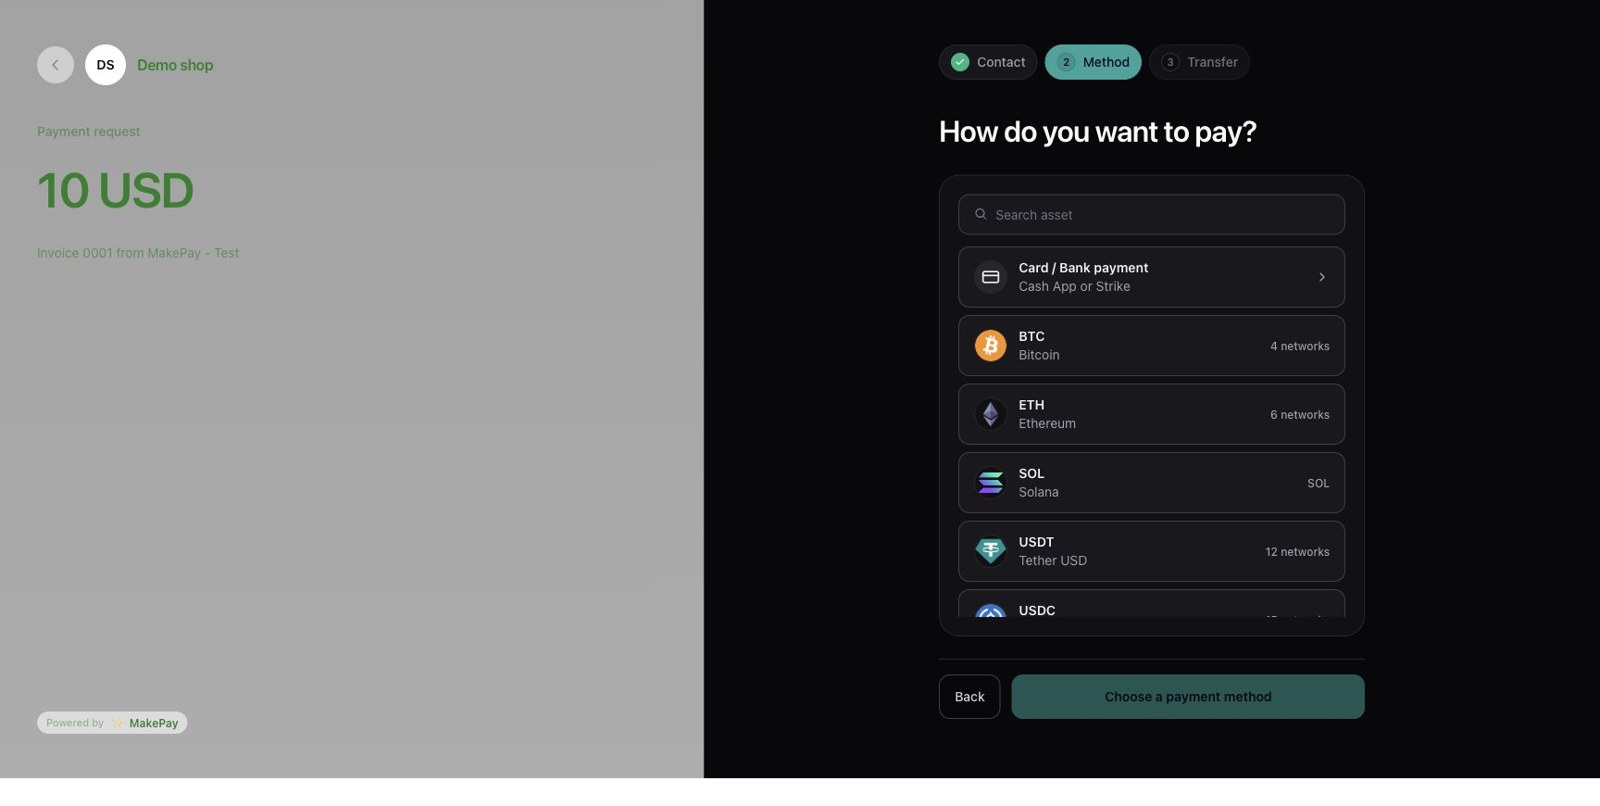
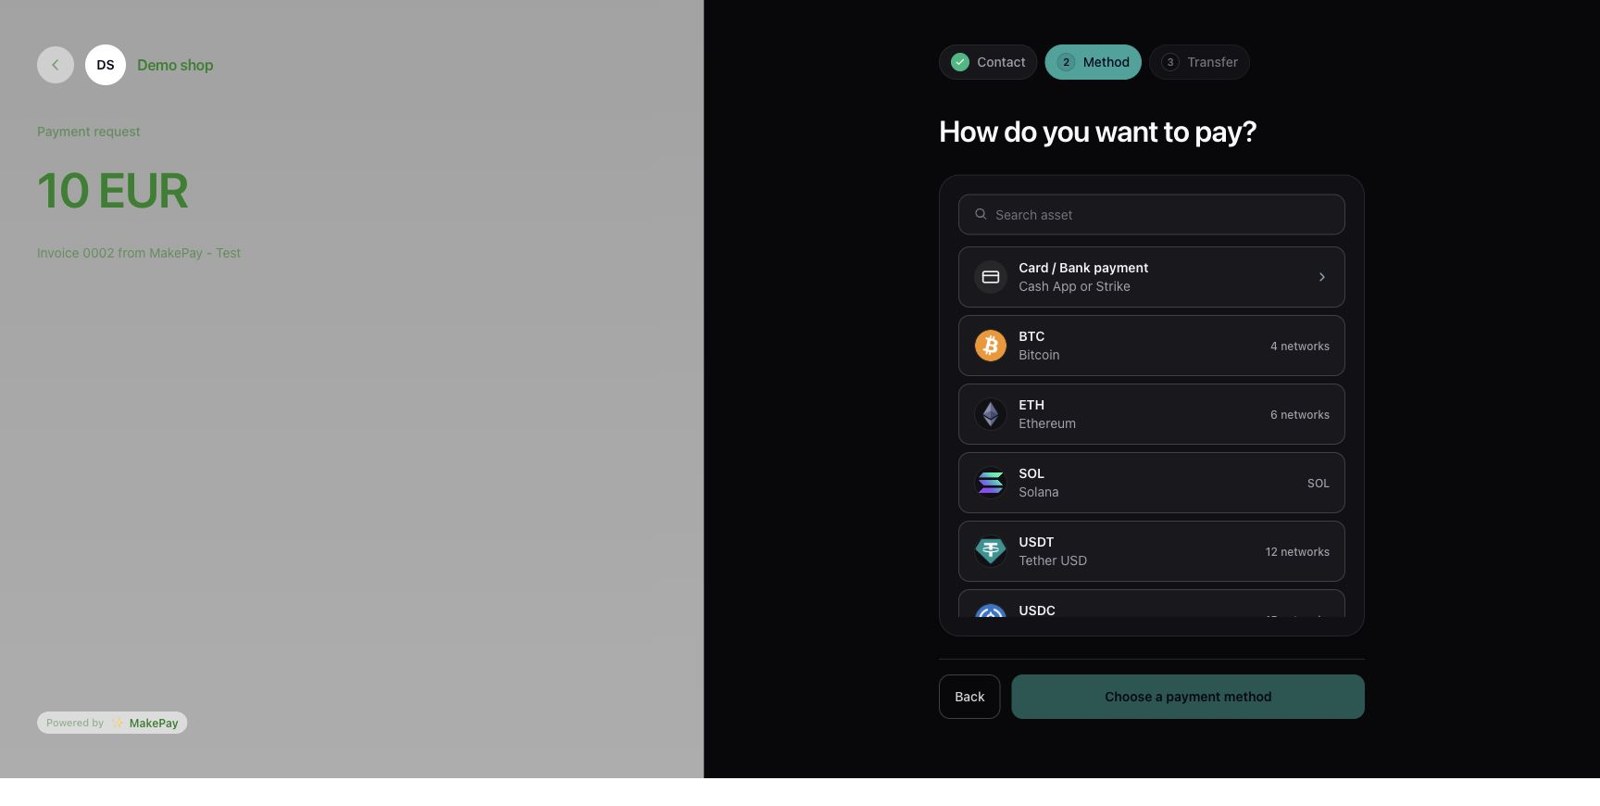
MakePay verifies its recorded settlement against the merchant, checkout, invoice currency and amount, then creates a Cryptocurrency payment in Invoice Ninja and allocates it to the invoice. Retry deliveries reuse the same payment reference. Allow a few minutes for background reconciliation, then check Invoice Ninja → Payments and the updated balance in Bookkeeping → Invoices.
Invoice Ninja's normal payment notification settings control its receipt emails. Configure and test those settings separately from invoice and reminder templates.
Troubleshooting
- No Cloud gateway in Invoice Ninja: connect through MakeCrypto Bookkeeping and use its PDF/email snippets. The self-hosted PHP installer cannot be uploaded to the hosted service.
- Token rejected: confirm the selected Invoice Ninja company, administrator permissions, API access and token status. Update the token through the connection form if it needs attention.
- Custom field needs attention: the selected field contains another value. Preserve it and reconnect with an unused field instead of overwriting business data.
- Draft or closed invoice: only issued invoices with an outstanding balance can create checkout. Deleted, archived, cancelled and paid invoices cannot collect payment.
- Review required: the client, currency or balance changed after checkout, or settlement could not be allocated safely. Review the payment before requesting another one.
- Email blocked: complete Invoice Ninja's phone/sender verification and check its delivery status. MakePay cannot bypass those requirements.
- Disconnect: open checkouts pause and payment URLs stop working. Reconnect the same company to restore its stable links and reconcile payments arriving later. Completed payments awaiting reconciliation must be resolved first.
- Refunds: handle the refund and record it manually in Invoice Ninja after checking settlement.